 Pin It
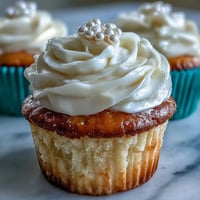
 My sister texted me a photo of her graduation cap three weeks before the big day, and I knew I had to make something that captured that feeling of accomplishment but tasted like pure celebration. These cheesecake bites came together because I wanted something impressive but not intimidating, something that could sit proudly on a dessert table with a little diploma pick sticking out of each one like tiny edible congratulations. The first batch taught me that mini muffin pans are honestly the secret to looking like you have everything under control.
I'll never forget watching my friend's mom take a bite at the graduation reception, and her whole face changed like she'd just discovered something wonderful. She immediately asked for the recipe, then the person next to her did too, and suddenly I was standing there in a dress I wasn't entirely comfortable in, talking about cream cheese ratios instead of feeling awkward. Those little picks made everyone smile, and that's when I realized this recipe wasn't just about cheesecake at all.
Ingredients
- Graham cracker crumbs: The foundation that tastes like summer and butter; I learned to buy pre-crushed ones to save my sanity, though crushing them yourself in a bag with a rolling pin feels oddly satisfying.
- Granulated sugar: Both in the crust and filling, it adds just enough sweetness without making these taste like dessert overload.
- Unsalted butter, melted: Use real butter here because it's what makes the crust actually taste like something worth eating, not just a vehicle for holding things together.
- Cream cheese, softened: This is non-negotiable; cold cream cheese will give you lumps and frustration, so let it sit on the counter while you prep everything else.
- Egg: Just one, and it's what gives the filling that perfect tender crumb instead of rubbery texture.
- Vanilla extract: A teaspoon is all you need to make people wonder what makes these taste like home.
- Sour cream: The secret ingredient that adds tang and keeps the filling impossibly smooth and a little less heavy.
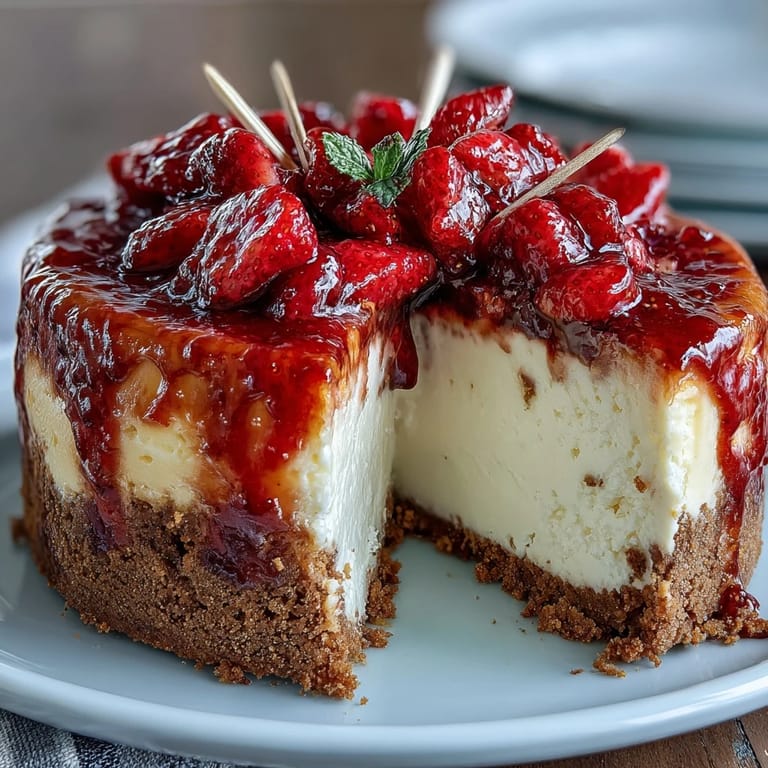
- Fresh mixed berries: Whatever's freshest at your market works; I've used raspberries solo when that's what looked good, and it was absolutely perfect.
- Fruit preserves: Optional but worth it for that glossy, professional-looking finish that makes people assume you went to pastry school.
- Diploma picks: You can buy them or make them with toothpicks and tiny rolled paper if you're feeling crafty and have time to burn.
Tired of Takeout? 🥡
Get 10 meals you can make faster than delivery arrives. Seriously.
One email. No spam. Unsubscribe anytime.
Instructions
- Prep your pan and heat your oven:
- Preheat to 325°F and line your mini muffin pan with liners while the oven comes to temperature. This temperature is lower than you might expect, but it's the secret to creamy centers that don't crack.
- Build the crust:
- Mix graham cracker crumbs, sugar, and melted butter until it looks like wet sand, then press about a teaspoon into each liner. The pressing is important; give it a little firmness so it holds together when you bite into it.
- Toast the crusts:
- Bake them alone for 5 minutes just until they're set and smell incredible, then let them cool slightly. This step prevents soggy bottoms, which I discovered the hard way on my first attempt.
- Make the filling:
- Beat softened cream cheese with sugar until it's completely smooth with no lumps hiding anywhere. Add the egg, vanilla, and sour cream just until everything is blended; overmixing is what creates cracks later, so stop as soon as it looks combined.
- Fill and bake:
- Spoon about a tablespoon of filling into each crust and smooth the tops gently. Bake for 13 to 15 minutes until the centers jiggle just slightly when you gently shake the pan; they'll continue cooking as they cool.
- Cool with patience:
- Leave them in the pan for 15 minutes, then move to a wire rack. This gradual cooling prevents cracking and keeps the texture tender instead of dense.
- Chill completely:
- Give them at least an hour in the refrigerator, though overnight is better if you have the time. Cold cheesecake bites are easier to handle and taste more luxurious.
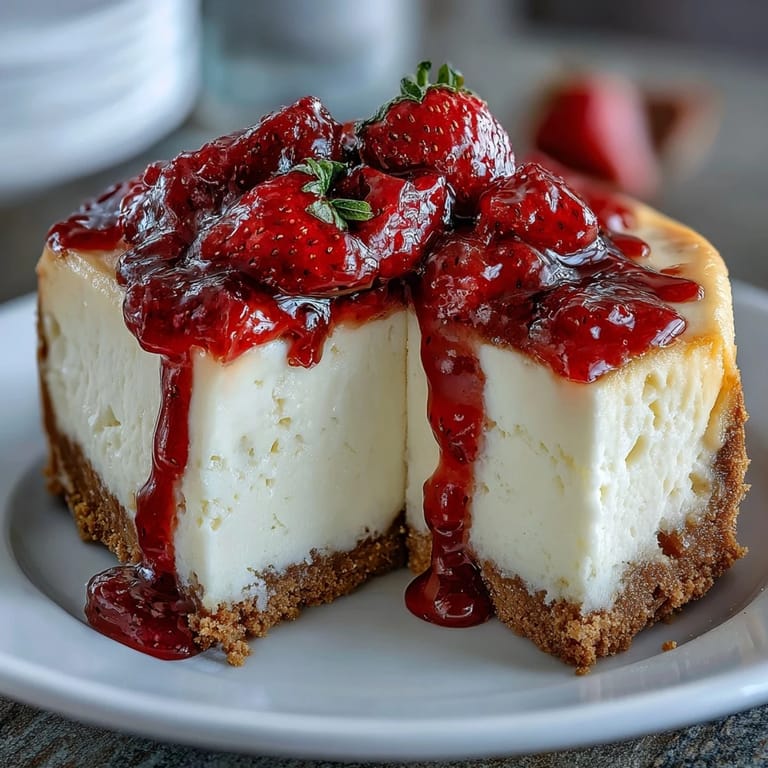
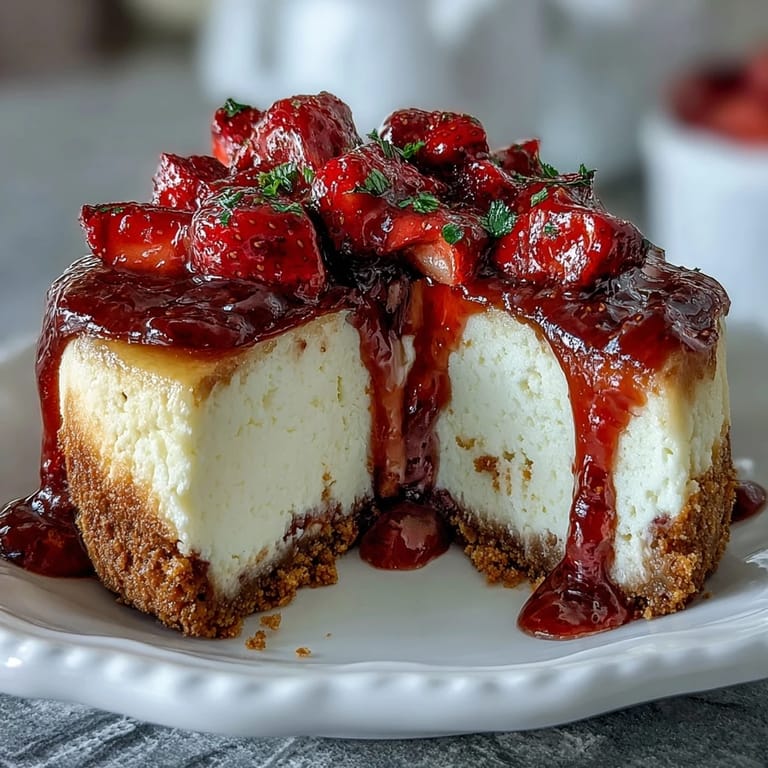
- Top and decorate:
- Add berries to the top of each bite, and if you're using preserves, warm them gently and brush on for shine. Add your diploma picks right before serving so they stay sturdy and look celebratory.
 Pin It
 There's something about watching someone taste something you made and seeing their whole day improve just a little bit. These cheesecake bites have a way of doing that, especially when they're decorated with those little diploma picks and served at exactly the right moment.
Why These Work for Celebrations
Bite-sized desserts are the MVP of any celebration because they're elegant without being fussy, and people can enjoy them without feeling like they're committing to an entire slice. I've served these at three graduations now, and every single time someone asks if I'm catering or if I opened a bakery when they thought I wasn't looking. The diploma picks do about ninety percent of the visual work, turning simple cheesecake bites into something that feels intentional and special.
Making Them Your Own
The beauty of this recipe is that it's a blank canvas for whatever flavors you're dreaming about. I've added lemon zest to the filling, swirled in chocolate, topped them with salted caramel, and even made a mini batch with matcha for a friend's tea party. The cream cheese base stays exactly the same, so you can get creative with confidence knowing the structure will hold up your ideas.
Storage and Make-Ahead Magic
One of my favorite things about this recipe is how far ahead you can make them, which means the day of your celebration you're actually present instead of panicking. I usually make mine three days before and keep them covered in the refrigerator, and somehow they taste better with a little age. The flavors settle, the texture becomes even more luxurious, and you get to show up to the party having already handled the dessert situation.
- Make the whole recipe up to three days ahead and keep them covered in an airtight container in the refrigerator for maximum flavor development.
- Add the diploma picks and any final garnishes just before serving so they look fresh and the picks stay crisp.
- If you're transporting them, keep them in their liners in a sturdy container with parchment between layers to prevent any sliding around.
 Pin It
 These cheesecake bites are my answer to wanting to celebrate the people you love without spending all day in the kitchen. They're the kind of dessert that makes moments feel a little more special.
Recipe FAQs
- → How do I prepare the graham cracker crust?
Mix graham cracker crumbs, sugar, and melted butter, press into mini muffin liners, then bake briefly to set.
- → What is the best way to achieve creamy filling?
Beat cream cheese and sugar until smooth before gently blending in egg, vanilla, and sour cream for a silky texture.
- → Can I add different toppings besides berries?
Yes, try fruit preserves for shine or experiment with lemon zest and chocolate swirls for variation.
- → How long should the bites chill before serving?
Chill the bites for at least one hour to ensure the filling sets properly and flavors meld.
- → Are gluten-free options possible?
Use gluten-free graham cracker crumbs in the crust to accommodate gluten sensitivities.