 Pin It
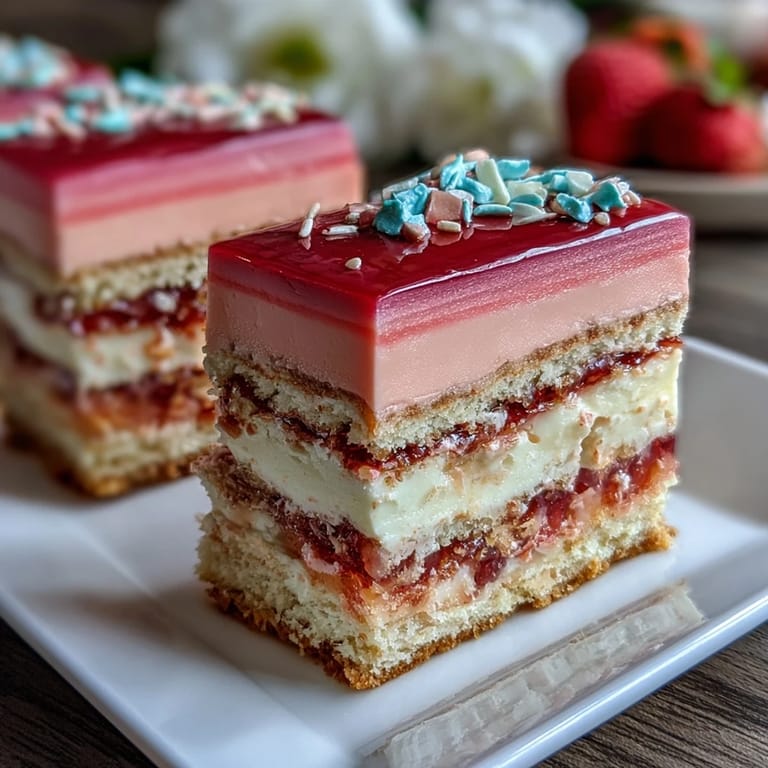
 My sister called in a panic two days before her spring garden party, asking if I could bake something that looked like sunrise. I found myself standing in my kitchen at midnight, mixing butter and sugar, thinking about how a cake could somehow capture that feeling of everything blooming at once. The ombre technique felt like painting with frosting, each layer a softer shade than the last, and by the time those three pastel layers were stacked, I understood what she meant about wanting edible beauty on the table.
Watching my sister's guests literally stop mid-conversation when this cake emerged from the kitchen box was when I realized decoration isn't just about prettiness, it's about creating a moment. Someone asked if I'd studied pastry professionally, and I had to laugh because the only thing professional about my setup was pure stubborn determination and a YouTube video at 1 AM.
Ingredients
- All-purpose flour: Three cups gives the cake structure without making it dense; make sure it's measured by spooning into a cup and leveling, not scooping directly from the bag.
- Baking powder: Two and a half teaspoons is your lift and rise, so don't skip the sifting step or you'll get lumps that bake into hard spots.
- Salt: Half a teaspoon might seem tiny, but it sharpens all the vanilla notes and keeps the sweetness from feeling cloying.
- Unsalted butter: Room temperature is non-negotiable here because cold butter won't cream properly with the sugar, and you need that airiness for a light crumb.
- Granulated sugar: Two cups sounds like a lot until you taste the vanilla cake underneath, which stays moist and tender because of it.
- Eggs: Four large eggs at room temperature mix evenly into the batter without creating streaks or lumps that won't incorporate.
- Pure vanilla extract: One tablespoon is the whole backbone of flavor, so use real vanilla, not imitation, because the difference becomes obvious in a simple cake like this.
- Whole milk: One cup at room temperature alternated with flour creates a tender crumb and helps distribute heat evenly during baking.
- Gel food coloring: Pink and yellow gel colors stay vibrant without watering down the batter like liquid coloring does, and you only need a tiny toothpick dab to get pastel shades.
- Unsalted butter for frosting: One and a half cups beaten until creamy creates the silky base that holds those ombre layers together.
- Powdered sugar: Five cups sifted removes every tiny lump that would show as grainy texture in the final frosting.
- Milk or heavy cream: Three to four tablespoons adjusts the frosting consistency, and heavy cream makes it slightly sturdier for ombre work.
Tired of Takeout? 🥡
Get 10 meals you can make faster than delivery arrives. Seriously.
One email. No spam. Unsubscribe anytime.
Instructions
- Set your stage:
- Preheat the oven to 350 degrees Fahrenheit and grease three eight-inch round pans with a light hand, then line the bottoms with parchment paper cut to fit. This prevents sticking while letting steam escape evenly.
- Mix the dry foundation:
- Whisk together flour, baking powder, and salt in a medium bowl, making sure the baking powder gets distributed throughout. Set this aside and forget about it for now.
- Cream the butter and sugar:
- Beat room-temperature butter with sugar on medium speed for three to four minutes until it looks pale, fluffy, and almost frosting-like. Listen for when the mixer sounds a little quieter, which means the air has fully incorporated.
- Add eggs one at a time:
- Drop each egg in individually and beat well after each one, watching as the mixture gets glossy and smooth. If you dump all four eggs in at once, they'll sit in little pools instead of mixing evenly.
- Stir in the vanilla:
- Mix in one tablespoon of pure vanilla extract until you smell that rich, warm aroma throughout the bowl.
- Alternate wet and dry:
- Add the flour mixture and milk to the butter mixture in three additions, starting and ending with flour, mixing just until the streaks disappear. Overmixing at this stage develops gluten and makes the cake tough.
- Divide and tint the batters:
- Scoop one-third of the batter into each of three bowls, then add a tiny toothpick dab of pink gel coloring to one bowl and yellow to another, stirring gently until the color is even. Leave the third bowl plain for a neutral center layer.
- Pour and bake:
- Pour each colored batter into its prepared pan, smoothing the tops gently, then bake for twenty-two to twenty-six minutes until a toothpick inserted in the center comes out clean or with just a few moist crumbs. The cakes should spring back when you lightly touch the top.
- Cool with patience:
- Leave the pans on the counter for ten minutes so the cakes set slightly, then turn them out onto wire racks to cool completely. Rushing this step results in layers that crumble when you frost them.
- Make the buttercream base:
- Beat one and a half cups of room-temperature butter on medium-high speed until it looks pale and creamy, then gradually add sifted powdered sugar, vanilla extract, salt, and three tablespoons of milk or heavy cream. Beat until the mixture is fluffy and light, adding more milk if it seems too thick.
- Tint the frosting:
- Divide the frosting into three bowls and add tiny touches of pink gel to one and yellow gel to another, stirring until the colors are soft and uniform. Leave the third bowl plain or add just a whisper of both colors for a pale peach middle layer.
- Level and place the first layer:
- If your cakes have domed tops, slice them off horizontally so they stack evenly, then place the yellow layer on your serving plate. Spread a thin layer of yellow buttercream on top.
- Add the middle layer and frosting:
- Top with the neutral or peach layer and spread with plain frosting, then place the pink layer on top. This creates the ombre foundation.
- Create the gradient on the sides:
- Spread the remaining frosting around the sides using an offset spatula, working yellow at the bottom and blending upward into pink at the top. Use a cake scraper or bench knife to smooth and even out the gradient, which takes patience and a light touch.
- Decorate and chill:
- Add pastel sprinkles, edible flowers, or whatever calls to you, then refrigerate for thirty minutes so the layers set and cutting becomes clean. This final chill prevents frosting smudging and cake crumbling.
 Pin It
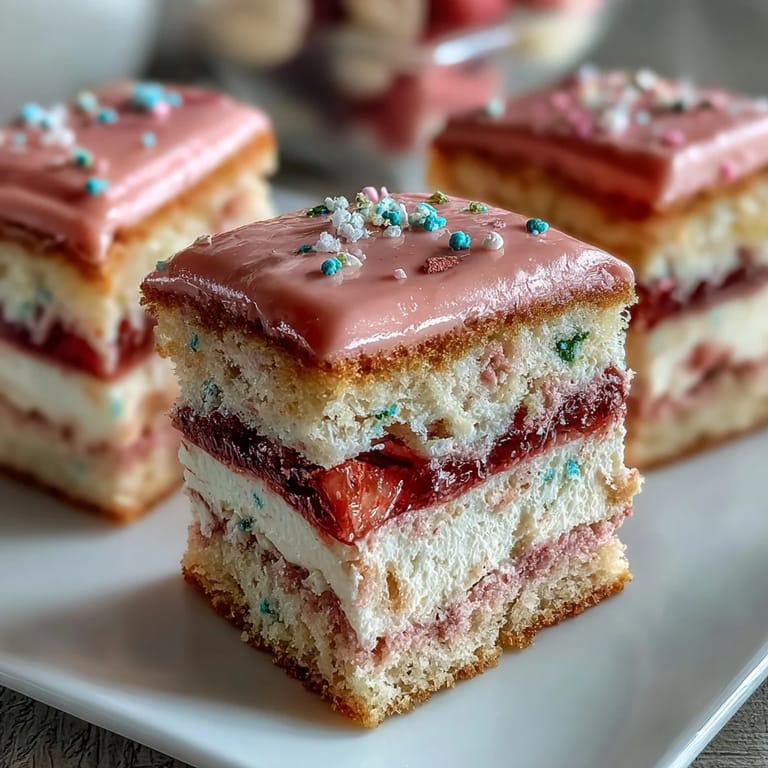
 My sister cried a little when she saw it, which felt ridiculous and perfect all at once, because a cake had somehow become the visual representation of hope and bloom. That's when I understood that baking isn't really about precision, it's about making something that makes people pause and feel something.
The Secret to Ombre Magic
The ombre technique intimidates most people, but it's really just about understanding that frosting colors blend where they touch. Start by piping or spreading your darkest shade at the bottom edge, then work upward with slightly lighter shades, letting the colors overlap and mingle naturally. A cake scraper held at a forty-five-degree angle and moved gently in circular motions smooths everything while creating that seamless gradient effect.
Why This Cake Works for Spring
Spring calls for celebration, and this cake answers that call visually before anyone even tastes it. The pastel pink and yellow feel fresh and hopeful without being childish, which means it works for garden parties, Easter gatherings, or anyone who wants their dessert table to feel like a sunrise. The soft vanilla cake doesn't compete with the look, it just provides a tender canvas that lets the colors shine.
Storage and Keeping
This cake stays fresh at room temperature covered loosely with a cake dome or plastic wrap for one day, though the frosting softens slightly if your kitchen is warm. Refrigerating it for up to four days actually intensifies the colors and makes the frosting firmer, which is perfect if you're baking the night before a gathering. Slice with a warm, wet knife for cleaner edges.
- If you bake the layers a day ahead, wrap them individually in plastic wrap so they don't dry out while you focus on frosting.
- Gel food coloring darkens slightly as it sits, so make your frosting shades a touch lighter than you want the final result to be.
- This cake travels well in a sturdy box as long as the frosting has chilled enough to hold its shape.
 Pin It
 This cake proves that beauty and ease can exist in the same dessert, and that sometimes the most memorable food is the kind that makes people stop and just look before they eat. Bake this for someone you love, or bake it to remind yourself that you can create something stunning in your own kitchen.
Recipe FAQs
- → How is the ombre effect achieved?
The ombre effect is created by dividing the batter into three parts and tinting them in pastel pink, yellow, and plain or lightly combined shades before baking each layer separately.
- → What type of frosting is used?
A silky buttercream, made from unsalted butter, powdered sugar, vanilla, and milk or cream, is tinted in matching pastel colors and spread between and around the cake layers.
- → Can I prepare this cake in advance?
Yes, once assembled and decorated, the cake can be chilled for up to 4 days when refrigerated, keeping it fresh and moist.
- → What tools are needed for layering and decorating?
You’ll need round cake pans for baking, an electric mixer for the batter and frosting, offset spatulas and a cake scraper for smooth layering and ombre effect.
- → Are there any common allergens?
This cake contains wheat, eggs, and dairy. Always check food coloring and decoration ingredients for potential allergens.
- → Any tips for vibrant pastel colors?
Using more concentrated gel food coloring in each batter portion will produce brighter pastel layers, enhancing the ombre look.